Laundry Room Reveal

If you follow me on Facebook (I’ll wait so you can click the link and press like…. 🙂 ) then you know I had a little project going last weekend. Today I’m going to tell you all about it.

I hate laundry! But I have two boys, two cats, a dog and husband so its sort of an everyday thing around here. In our old home we didn’t have a laundry room just this rinky dink closet. When we first bought this house I was so overjoyed just to have a laundry room but alas, that wore off quickly. My Pinterest feed has been filled with beautiful laundry rooms for ages and I had some serious design envy. I finally decided I was going to sit down and make some decisions about what I wanted and then just do it! The room is not very big at all so I knew I wouldn’t be adding anything major. And really we didn’t need a ton more storage as the room was currently functional. It just wasn’t pretty. I needed something to hang clothes that don’t go in the dryer on and the shelf we currently had was not working for that.

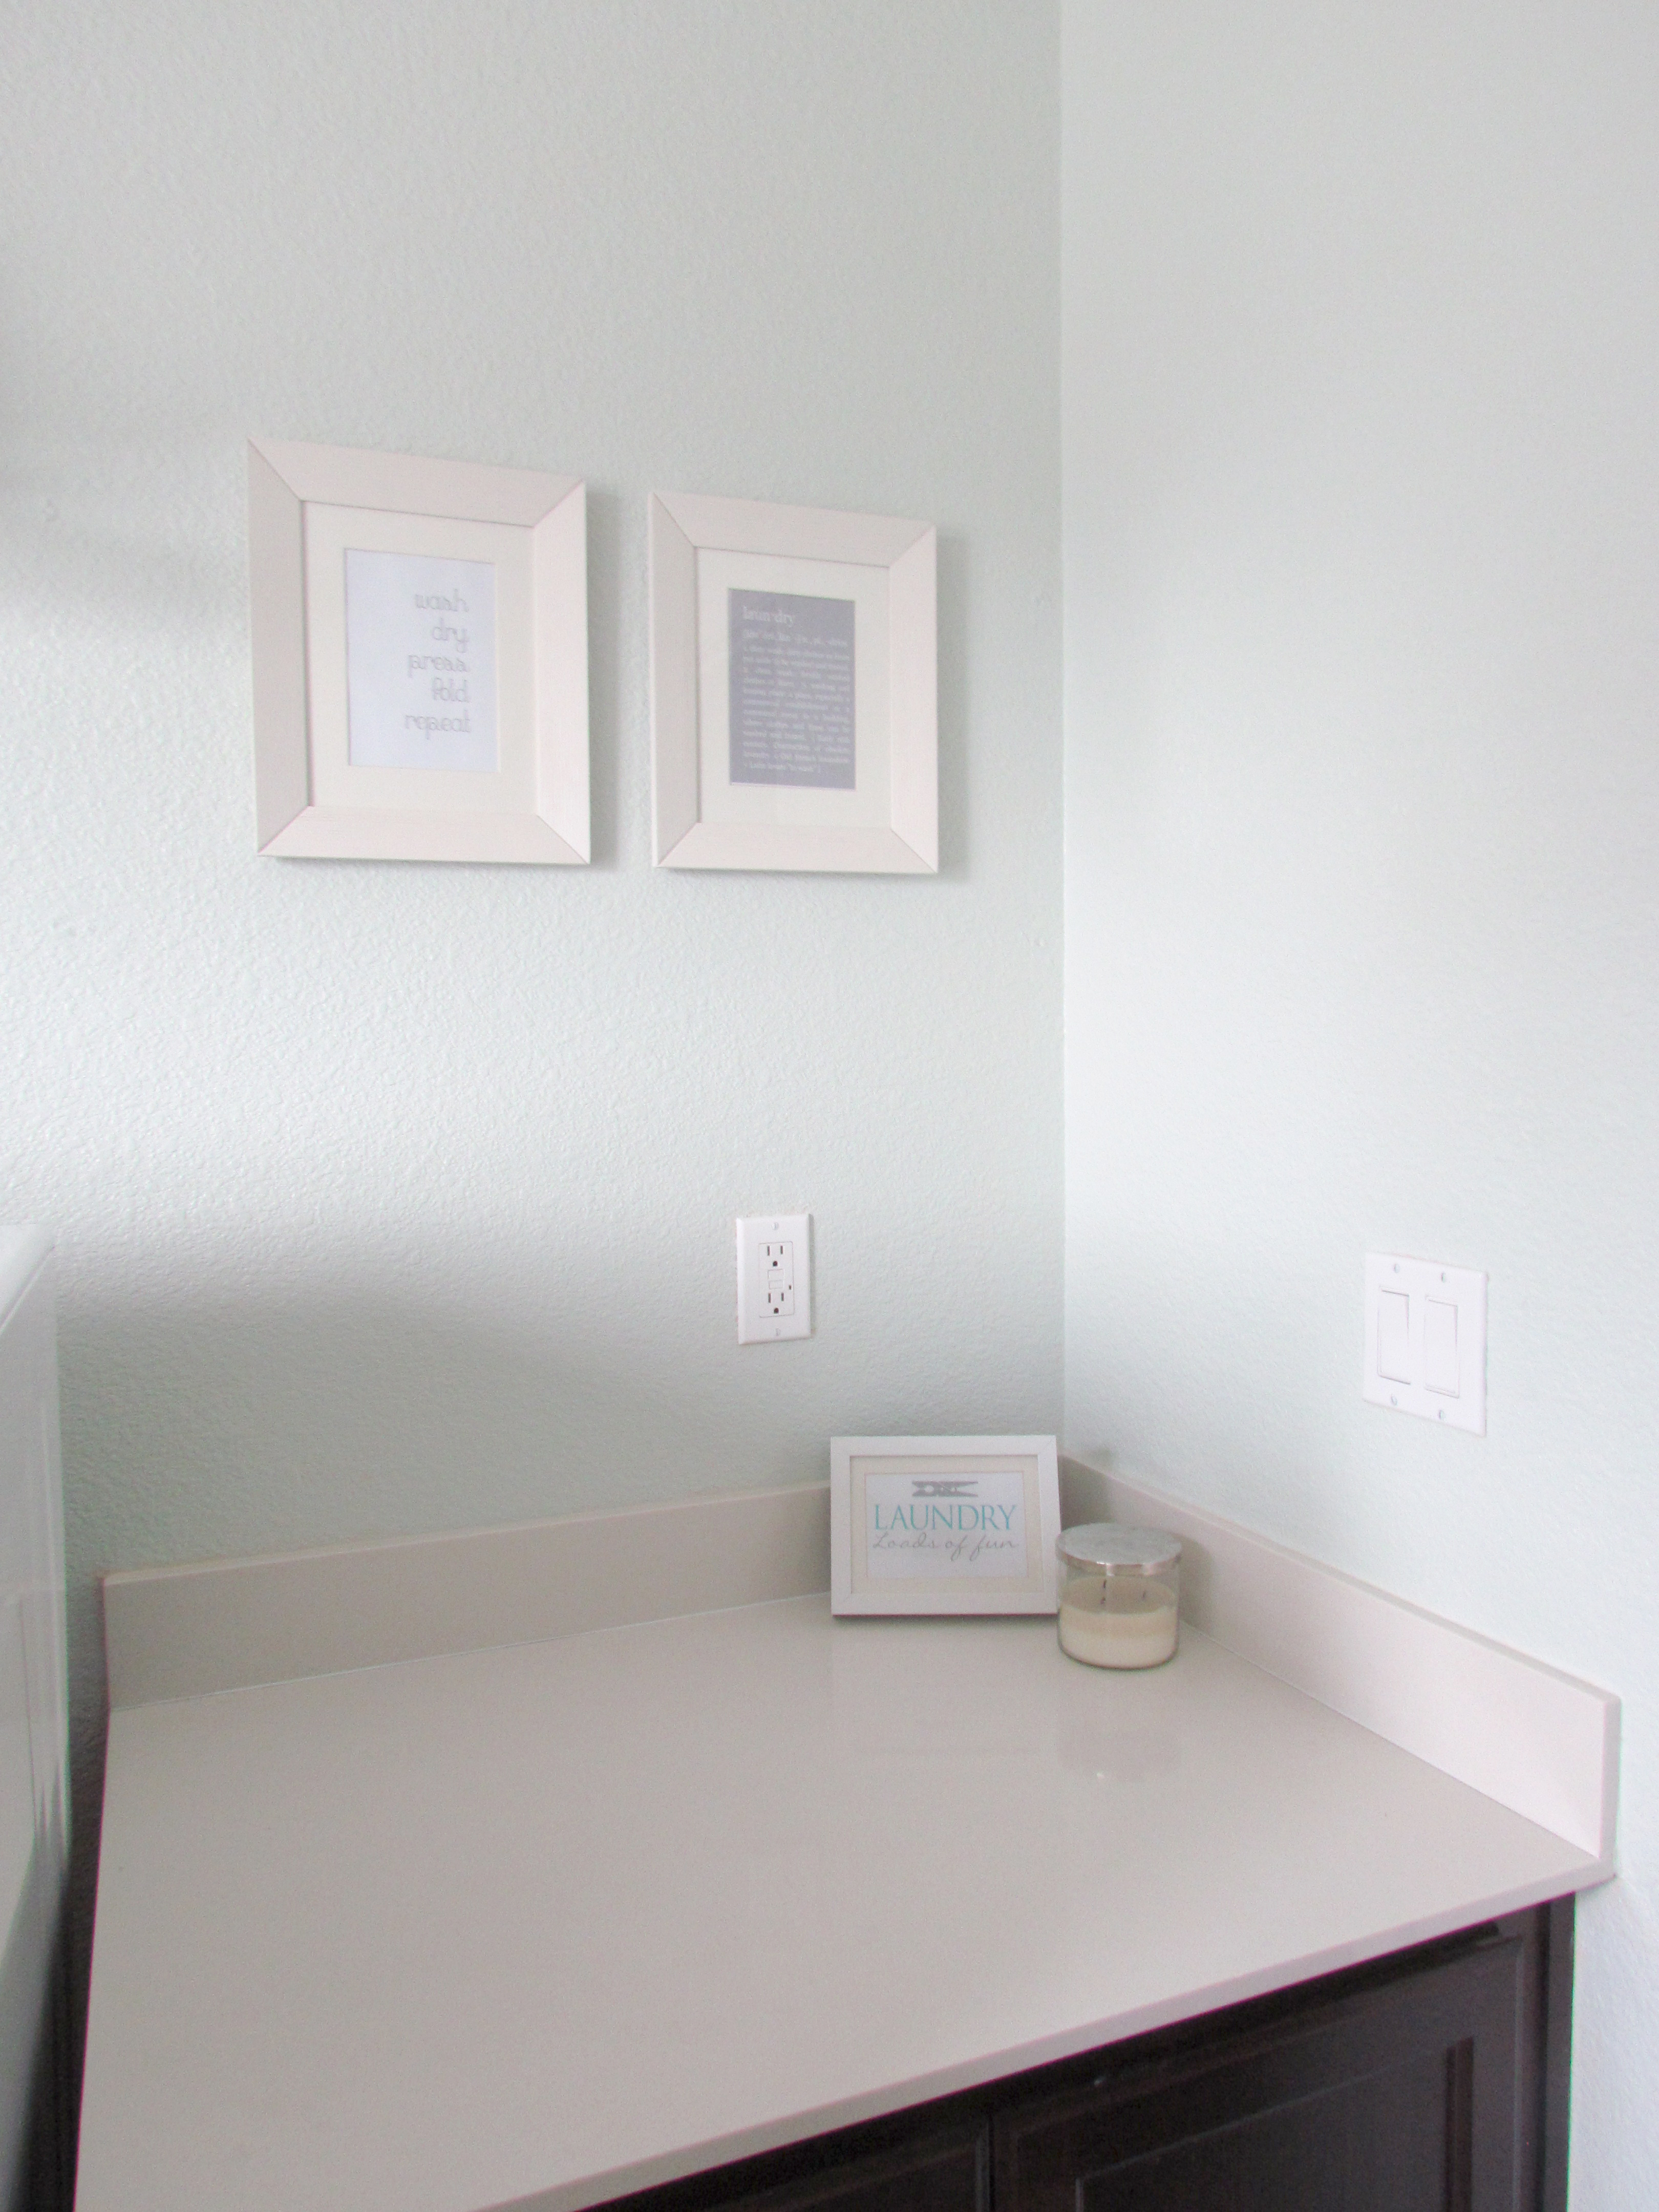
I decided to go with a big LACK shelf from Ikea above the washer and dryer that could be used for functional things as well as pretty things. I also decided to go with a towel bar I had hanging around the house that we bought at Ikea ages ago. The hardest decision was the paint. I knew I wanted something on the light side because the room is so small but I wasn’t sure if I wanted to go muted or bold.  Eventually I decided that muted was the way to go. I wanted the Laundry Room to make me feel like I was in a cottage at Martha’s Vineyard. Well as much as anyone could feel like that while folding dozens of mis-matched socks. I narrowed it down to two Martha Stewart colors from Home Depot; Spring Melt and Rainwater. I love the color that Rainwater puts on the wall but ultimately it was not right for the room. Spring Melt won out! Now that it is on the wall I could not be happier with the decision. It’s light and fresh and airy and just perfect!

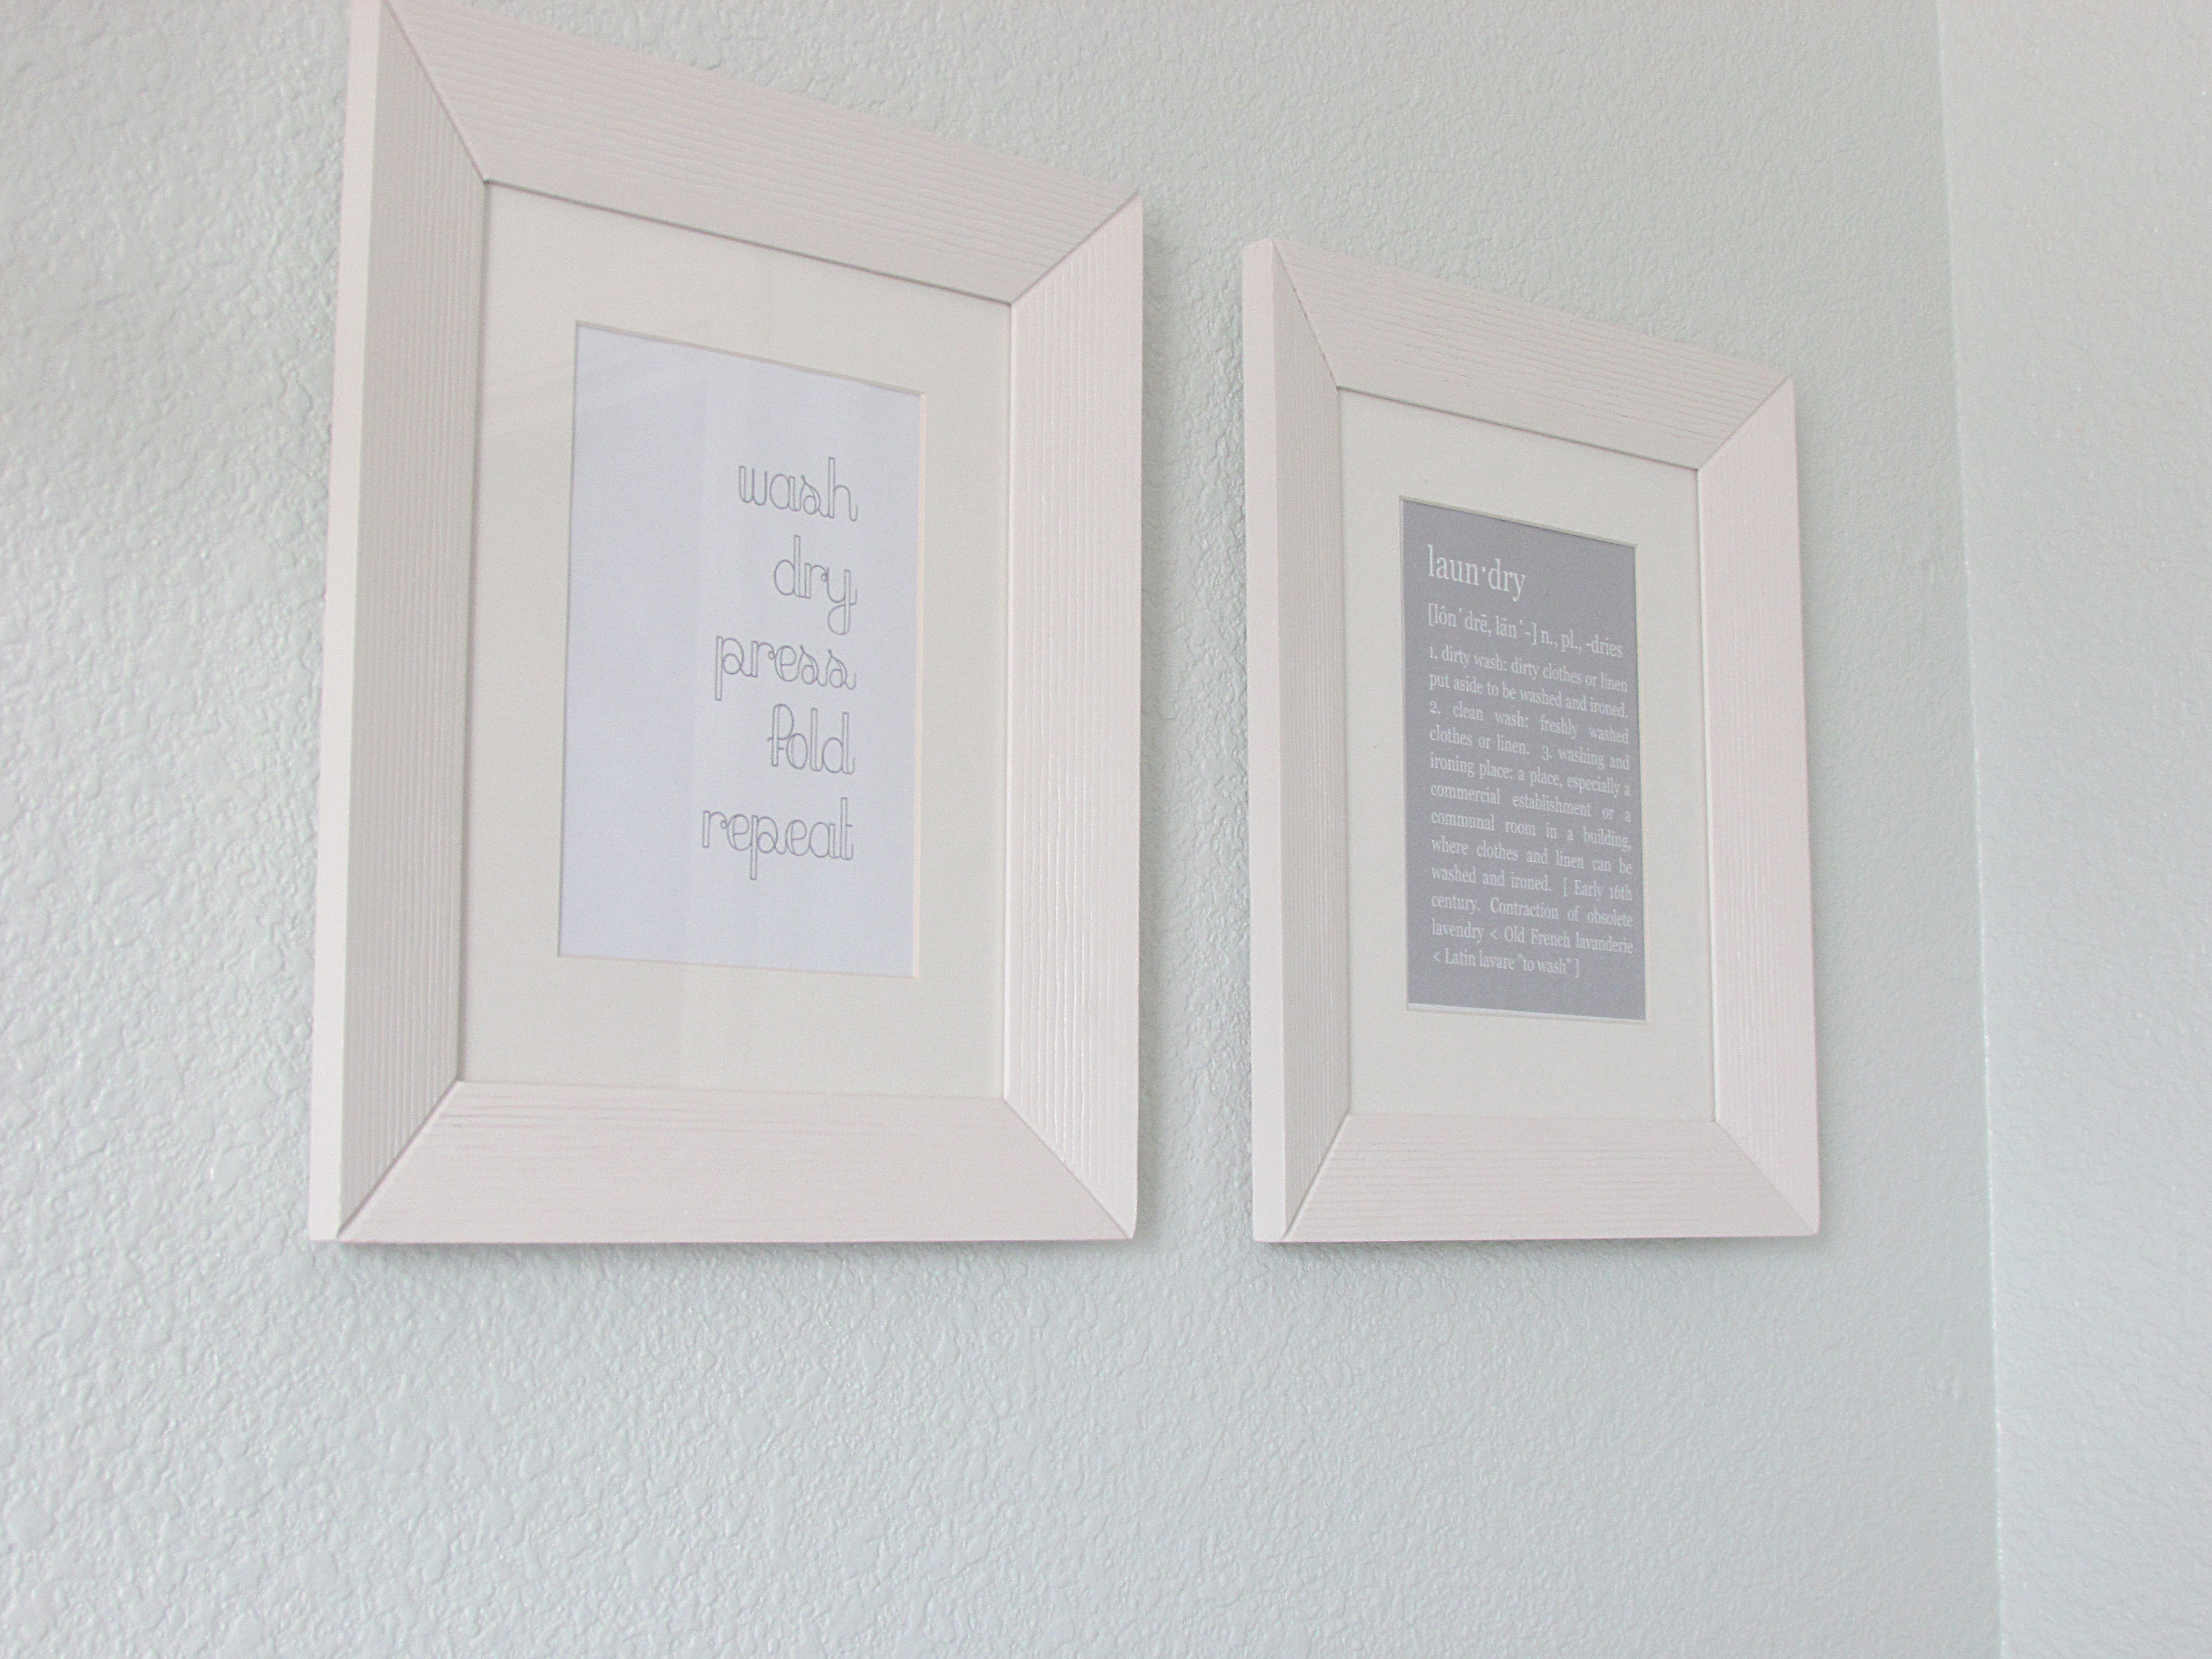
Sunday morning Hubby had to go to work for a few hours. So I put Buggy down for his nap and T$ and I got to work. Mostly that means he did about three strokes and decided this was a “Mommy job” and he went off to play Legos. I did the entire room without taping and just was careful around the baseboards and ceiling. Luckily I have a pretty steady hand. All in all the painting took me about an hour an a half to finish. As soon as hubby got home he hung up the shelf and frames for me and VOILA! my laundry room was complete!

Before:

Laundry Room Before4

Laundry Room Before2

After:

Laundry Room 6

Laundry Room 4

Laundry Room 3

Laundry Room 1

Laundry Room 2

Laundry Room 7

Laundry Room 8

Laundry Room 12

How did I do? My goal was to have a Pin-able laundry room, did I achieve that? What are some rooms you have done in your home and been thrilled with the outcome?

Untitled-1

Erin Condren Product Review

Today I am super stoked to share with you my absolute favorite organizing products. Back in 2011 I came across a blog {I wish I could remember which one}  that did a review on the Erin Condren Life Planner. I have always loved a paper planner. I just like to have something tangible in front of me. I’m weird like that I know. But I’m not alone because Erin Condren has a cult following! People cannot wait for the moment they can order their new yearly planner. In fact I just ordered mine and cannot wait to get it! This is the only way for me to keep everything I have going organized. What I love most about this planner over everything else I have ever tried is the morning, afternoon and night sections. It could not be more perfect for my life. Morning is where most of my reminders for work go. Afternoon is where my house chores normally go. And Evening is where my blog notes go. The 2013-2014 Life Planner even has a section for me to put our meal plan! HUGE addition in my opinion. If you want a full on tour of the Life Planner visit here.

I also have an Erin Condren Notebook. This thing I TRULY LOVE! I make a to do list for work every week. I have since the day I started and I have always been very particular about the notebook I keep. It needs to have the right sized lines, it needs to be the right thickness in paper, it needs to be crazy sturdy to stand up to little fingers, warehouses, and wine spills. This notebook is ALL of that and then some. I adore the pouch in the back to throw my receipts in when I’m traveling and the size is perfect to fit into my bag.

The Functional Family Planner is a new product that Erin Condren introduced just a few months ago. When I first received the email I just filed it away thinking, “I already have a planner, I don’t need this, too.” Then my office got a bit of an overhaul and the DIY dry-erase calendar I had was replaced by my Martha Stewart Wall Unit. I lived without a “family calendar” up for a while. Then it dawned on me… as the boys grow older and we start doing more and more activities I wanted a place where everyone could see what was going on. And of course it had to be stylish. Ding ding ding, Functional Family Planner please!

Lucky for me this also was right around my birthday so my awesome mom purchased it for me! EVEN BETTER! This is the product I never knew how bad I needed until I had it. It is just the perfect spot to put all the craziness that is going on in our life down onto paper. You can either purchase the chore chart or the schedule pad. I opted for the schedule pad. And to make it last even longer I split the page in half and fit two weeks onto one page. I love that I don’t have to remind my hubby what is going on in a week. It is just all right there in front of him every time he walks in the house. I foresee this being a huge help as each year passes with the boys. I also really love the dry erase portion that has a spot to fill out all the important numbers, etc. for whenever we are out.

So enough talking about all these great products! Check out the pics below:

I have to also mention that I did purchase their pens last year and hated them. This year I purchased the new marker type pens with my Functional Family Planner. I LOVE them! They are the perfect addition!

What do you do to keep your busy schedule organized? Is it important for your significant others and children to know what is on the calendar?

Untitled-1

Snack Prep 101

Title Snack Prep Image

With Back to school fast approaching (yes, its already that time of year) I feel like every parent is trying to get organized and geared up. For me back to school has always been like a second New Year. It’s a chance to get reorganized, get back on schedule, and try to stay on task. My boys aren’t quite old enough to go to school full time but T$ does go to preschool three days a week this year! WOW, has the time flown. I’m trying very hard to instill good habits in him regarding school. Things like eating a good breakfast, having all of our school supplies ready the night before, learning to put his school papers in their place, etc.

Not only do I need to teach him good habits but I need to get myself into good habits for his school year. When T$ goes to school guess who takes him? ME! Guess who picks him up? ME! Guess who’s busiest time of year at work also coincides with back to school? MINE! Every single minute around here is precious. So to optimize every single minute I try and do as much as I can the night before to get ready for the next day.

As I mentioned earlier, Hubby is amazing at getting T$’s lunch ready ever day. But he doesn’t do snacks for the boys or myself (hey, the poor guy only has so much time). When someone around here is ready for a snack it is an emergency. You think I’m kidding? This is no laughing matter people! I’m including myself in this by the way. We get hungry and cranky! This of course leads to convenience  snacks which aren’t all bad but I am trying to do better. To remedy this problem I’m working on getting in the habit now of having healthy snacks all prepared for us the night before. That way when the hunger pains begin we are ready for them.

So on to today’s snacks …First up Apples and Graham Crackers:

This is a staple because it is one fruit I know T$ will eat no matter what. Also, it is so easy to get ready. I have this handy dandy apple slicer from Williams Sonoma that makes getting this snack ready a breeze!

For our afternoon snack we will be having Strawberries and Cheese.

T$ is a crazy picky eater. He loves strawberries as long as I only cut the top off of them. I cannot slice them or dice them or do any other form of prep of them. Buggy can’t really shove a whole strawberry in his mouth yet so I have to do two separate preparations. C’est la vie!

snacks

Whole strawberries for T$ in the blue Bynto, sliced strawberries in the green Snack Box for Buggy

I always prep our snacks in one of three containers:

1. A Mason Jar — I have TON and they are so easy to clean. They work great for bigger snacks like celery sticks or slices of watermelon.

2. Goodbyn Bynto Box — This is what we use when T$ takes a lunch to school. We own two and they are especially great for when we will be out all day and I need multiple snacks for both boys. They fit perfect in my diaper bag, are dishwasher safe, BPA Free and basically one of my absolute favorite kid products we own.

3. Goodbyn Snack Pack — Again we love these because they fit in the diaper bag, are easy to clean and are safe!

If your looking for a place to purchase the Goodbyn products I cannot recommend Eco Chic Baby & Home enough! I promise you will not be sad you ordered from them!

Do you do any special snack prep for your little ones? Have any great snacks to share with us? I would love some new ideas! Come to think of it I bet my boys would too!


Untitled-1

WAHM Series: Rotating Toys

Bold Font 1

Wow! I cannot believe we are already to the 4th post in my WAHM Series! Just to recap for anyone that is new we have already discussed how I keep the boys and myself on schedule here and here. And earlier this week we spoke about how I have set up Activity Zones so that we can work, play, and lounge in harmony. <— I have been dying to use the term “in harmony” for some reason!

Today I wanted to talk to you about one of the tools that has been most useful in helping to keep my boys happy and me able to work. It is Rotating Toys. I’m sure you have read all over the blogosphere how families store away birthday and Christmas gifts and give their children the new toys throughout the year as they take away old ones. This in theory works great! Especially if your kids are only home playing with their toys a few hours a week. My situation is a bit different. I’m asking for my children to play independently for several hours a day. Unfortunately for me if we don’t have variety the boys get bored QUICKLY. I used to have everything out in the open so the boys could just go and get whatever they wanted to play with and didn’t need my help to get it. WOW I learned quickly what a massive mess that was. And as I mentioned earlier this week, visual clutter does not do it for me.  I needed to come up with a way to mesh the best of both worlds. Some toys needed to be out so I wasn’t getting up every two seconds and some toys needed to be put away so they were exciting when they did come out.

After much trial and error this is what I have found works for us:

  • I have left out “everyday” toys. These are toys that they play with every day whether I put them away or not. These consist of the train table, the dress up clothes, books, the fire truck, and the playhouse.
  • I have sorted the rest of our toys into categories: cars, trains, building blocks, Toy Story toys, Lincoln Logs, and Animal Shop.
  • Some of the sorted toys are out on shelves so they are easy for the boys to remember that we have them. Others are tucked away in a closet so I can suggest them when things are getting interesting AKA crazy!
  • The toys we have upstairs are always kept separate from the toys we have downstairs. This is a pretty big key for us. Downstairs toys are more interactive and are fun for us all to play together (i.e. Pirate Ships, play kitchen, etc.). Upstairs toys are more quiet and focused on imaginative play. This is part of the reason I have 4 different sets of blocks. Each is useful for a different imaginative play situation.
  • Once every 3 or 4 months we go through all the bins and clean them up a bit. We make sure any broken pieces are thrown out, pieces that were incorrectly put away are put back in their bins, and that the theme of the bin is still relevant. We had a “baby” toys bin upstairs for a long time that had rattles, small balls, touch and feel books, etc. that were specific for Buggy to play with as he was developing. At about 9 months of age he was totally done playing with these toys. When we did the last purge and organize session we packed these toys up and created yet another cars bin! (My boys LOOOOVE cars.)

I tried my best to get some clear pictures for you of how we store things but this room is dark and hard to photograph. Please excuse the less than perfect images 🙂

Toys Storyboard 1

Some details of our toy shelves and inner closet storage

I got the great idea to store each dress up outfit in a bag so all the pieces are in one place! its working great for us!

I got the great idea from a fellow mama to store each dress up outfit in a bag so all the pieces are in one place! So far this solution is working great for us!

Puzzles copy

Our current puzzle storage… needs some work, right?

STORAGE

Where the bulk of the “extra” toys are stored in the closet

I’m curious to find out, what organizing methods do you have for your little one’s toys? Do you rotate or keep them all out? What is working for you and what isn’t? I can’t wait to get some new ideas from all of you!

Embracing the crazy!

~ Rachel